Different? Yes. Awesome? Double Yes :) A beer tasting and baby shower are never two events you'll see combined but I took the challenge and we're hoping to make this a yearly tradition!
The beer tasting part...
I don't have the best photos to show since we were rushing to setup before guests arrived so I tried to explain everything the best I could below, steal pictures from my friends and of course I kept the leftovers because I can't bare to throw it all away yet!
Color theme: Pale Pink & Gold
THE INVITATION

The invite was designed and printed by Chris Kelly. I purchased the 'Shimmer Gold' notecards and envelopes in 'Paper Bag' from Paper Source and used double sided tape to attach the notecards to the invite.
THE BEER TASTING THEME
The main idea of this tasting theme was to open our friends up to other beers besides your usual bud light. We have a huge love of traveling and our biggest landmarks involve the best grub and drinks we can find. The craft beer culture is preferred in our daily adventures and the taste of your usual "cheap" beer isn't worth drinking to us any more when you want a beer that just tastes good. We know not everyone is open to it or they just haven't found an interest in it which is why we wanted to do a blind tasting, hence the numbered taped bottles. We chose some of our favorites and made sure they were all accessible in Tampa area, nothing was 'unreachable' and rare. All the purchasing was done at Total Wine.
In the Fall of last year we wanted to do a beer tasting event but we got busy and this happened. Since we knew we wanted to do a co-ed baby shower and all of our friends would be in one place we combined the events so our guests would have something fun to do at a baby shower and the attention wouldn't just be on us :)

MINOR DETAILS & DECOR
The beer tasting was outside so as soon as you entered the 'fun' area there was a table of (necklace) tasting cards with a pen and a take home tasting glass.
I'm not ready to blast her name just yet :)

I created the card in Pages (for Mac) in portrait letter size with very minimal margins so I could technically fit two cards on one sheet of paper. I had them printed at Kinkos and for $1.50 they cut all of them in half so it's one less step to do at home :) I holed punched the cards upside down and attached yarn to go around the neck, this way the card is right side up when you're writing your notes and scores. I also made sure to buy pens that had tops on them with a lip so they could clip onto the card and not have to carry anything but their tasting glass. I had the glasses made at Nice Price Favors, this was a random web search from reviews and cost and ended up being a very good purchase with great customer service.

Pitcher of Water: To rinse your tasting glass
'Pump & Dump' Beer Waste Bowl: to discard unwanted beer and glass rinses
Baby Food Tasting: One (pink) tin of clean toothpicks and one for dirty
Beer Tasting Answers: A sealed folded card at the very end of the tasting to disclose all tasting answers


Stickers were bought at Michaels and I bought the 'Confidential' stamp at Staples; or borrow one from your office :)

Comparing their guesses :)


Balloons: Party City
Tissue Paper pom-poms: I ordered pink and 'Desert Tan' tissue paper in bulk from Amazon and made the pom-poms you see hanging from the outside lights and at the dessert table.
Fabric/Table Cloths: all the 'table cloths' from inside and outside were bought from Hancock Fabrics for $20!
Signs: all signs were made from cardstock, I bought a scrapbooking cardstock themed book that had a lot of baby and pink themed pages. I used existing beer glasses we already had as 'stands' and filled them with one sheet of tissue paper just for decoration. The signs were attached with clothespin I made during Christmas time when I doused them with gold glitter.


Beer Bottle disguise: Duct tape in gold and pink with white polka dots, I bought these on Amazon and at Michaels
Baby's Breath: Cheap and plenty to fill in beer glasses!
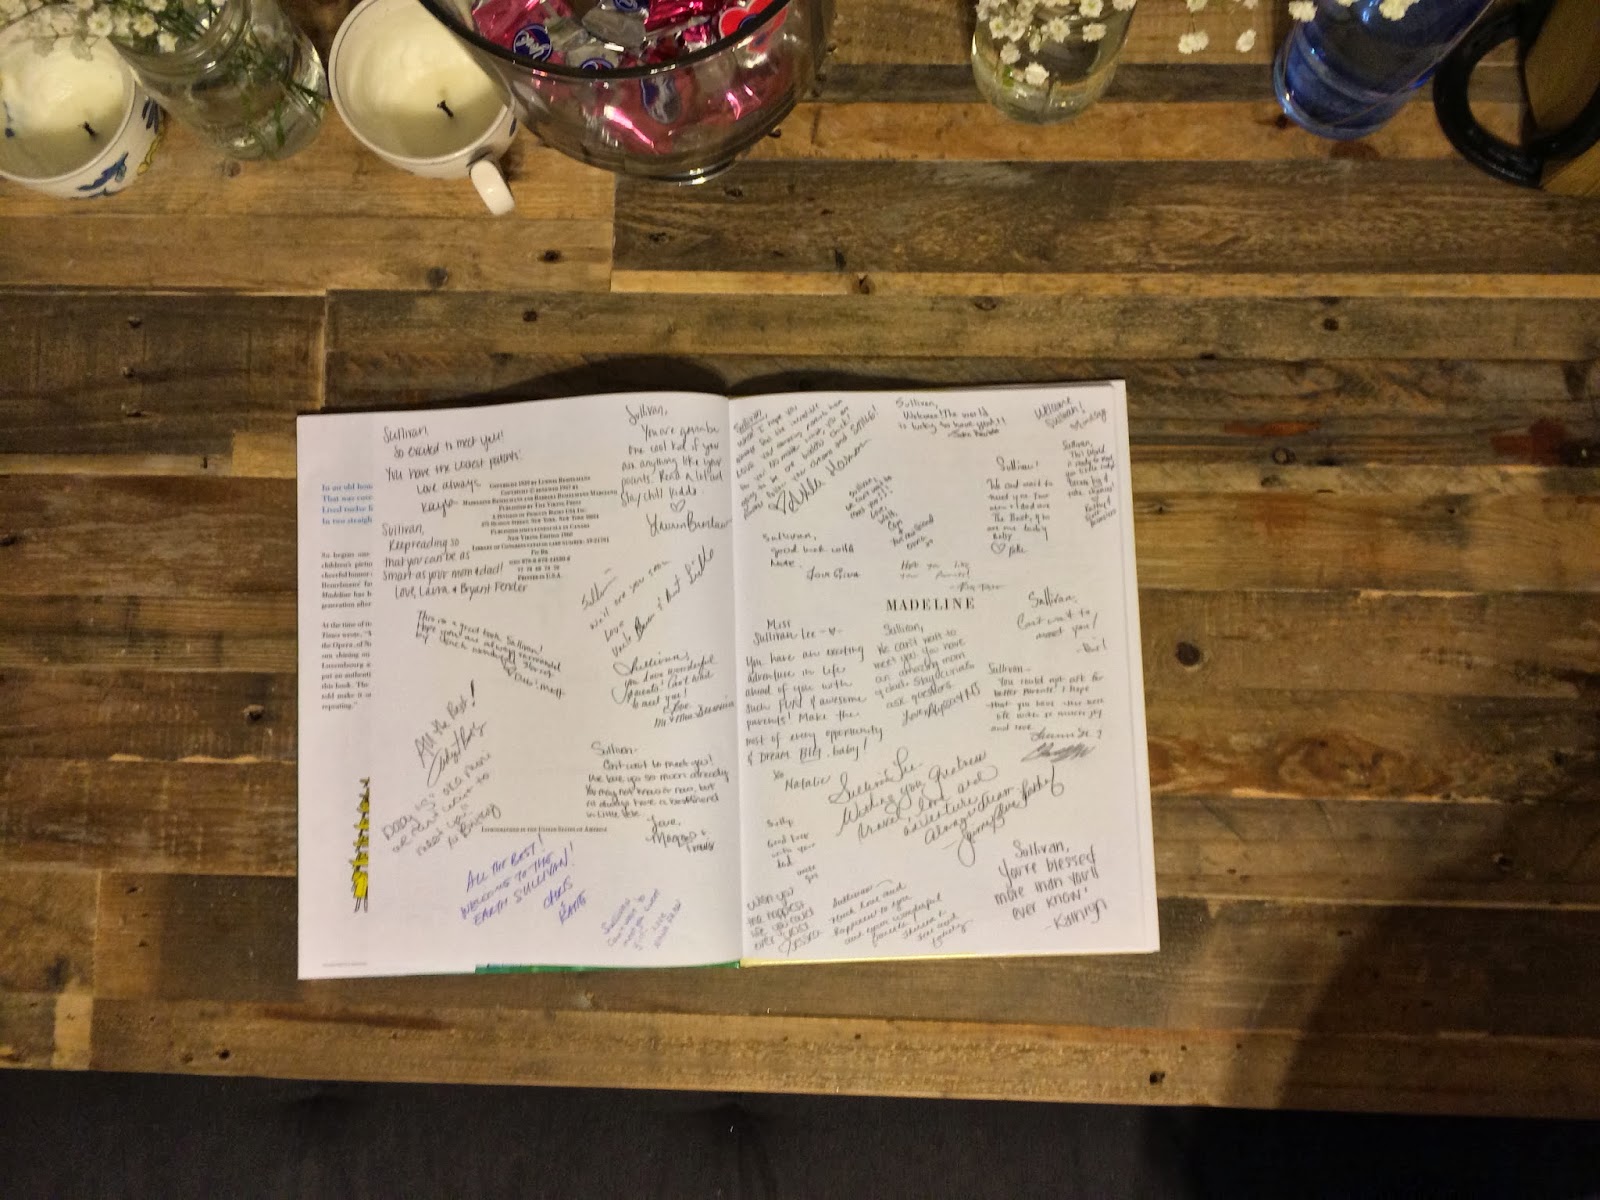
Guestbook: I used the book Madeline for guests to sign their name and placed it at the dessert table

Banners


1. I bought burlap in bulk from Amazon and made a stencil with regular paper so all the pieces would be even.
2. I cut squares of cardstock for the letters
3. I used mod podge, letter stencils and gold glitter to create the letters
4. To attach all the pieces I only used a hole puncher and pretty twine to lace them together.
THE BEERS


To have a nice flow of tastings we started with the lightest made to the heaviest/most different to the palate. The baby food tasting was just a little addition to incorporate at least one game into the baby shower portion of the day :) At the end of the table after all of the tastings I made a cheat sheet card so everyone would know what beers they tasted and which ones they actually liked without knowing what they were, besides the style.

I was given a lot of onesies ahead of time so I used them as decoration for the time being; they're held up by clothes pins and lace ribbon.

I made simple little name tags for (Grandpa) Walt and (Nana) Fran; cardstock, gift bag ribbon that comes with a big sticker on it and a safety pin. So easy!
THE DESSERT TABLE
The dessert table and kitchen area are places I didn't get ANY photos of...but there's a glimpse on the GoPro footage, coming soon :)
At the table: I ordered cake pops and macaroons from Hands on Sweets, a friend made Maple Cream Cheese cupcakes and my mom made a strawberry bundt cake. I included a bag of 'The Reds' Starburst Jellybeans and since Valentines Day was the weekend prior I grabbed pink coated M&Ms and Pink wrapped chocolates to place in various bowls. This was my favorite table.


This doesn't fall under any category, just a little tid bit. The gifts were kept in the nursery so guests would feel welcomed to see the progress and where Baby S will be sleeping! :)
No comments:
Post a Comment